When building new Virtual Machines (VM’s) in a corporate environment, it’s preferred to built them with a Standard Operating Environment (SOE) and while you can do this manually by attaching an ISO image and selecting options, it’s far more productive to do this using a kickstart script so you can achieve repeatability and adhere to your corporate SOE.
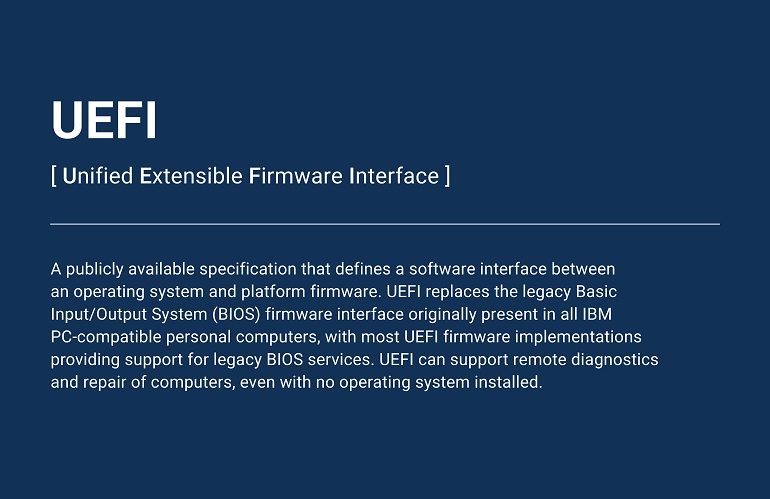
One way to achieve this with modern hardware is to initially EFI boot the environment. This also applies to new VM’s (where EFI boot is a default option in VMWare 7+ install these days). Previously you could legacy PXE boot a system, but this feature is slowly being replaced with EFI.
Building the necessary systems to achieve this is incredibly simple, you need three things:
- A DHCP server
- A TFTP server
- and a Web Server.
Installing Packages
Using a single line you can install all the required packages:
dnf install dhcp-server tftp-server xinetd httpd -yWith EFI, you do not need to install syslinux or any PXE related tools, all the code to boot the environment is on the ISO image. Once you install the packages, start the environments.
systemctl enable xinet dhcpd httpd
systemctl start xinetd dhcpd httpd
Step 1 – DHCPD configuration
The dhcpd server responds to known MAC addresses, it provides back to the requester the configured IP, hostname and grub boot file and the TFTP server IP. The VM then does a tftp request to get the correct grub boot menu, or a default menu if none is specified. You can track the progress in the /var/log/messages file using the command below (once xinetd/tftp is configured):
tail -f /var/log/messages
Mar 28 12:53:57 tri-dhcpd-90 xinetd[1176]: START: tftp pid=29957 from=192.168.1.133
dhcpd has now now done its job and the VM will tftp the required files, this will then call in a few more files as the grub2 menu starts.
Modularising the dhcpd host entries
Setting up the dhcp server can be done in a very minimalist and module way that allows numerous hosts to be deployed. Below is the minimal configuration I discovered for pure EFI boot (no PXE support) for a simple class “C” network 192.168.1.0/24:
#
# bare bones /etc/dhcp/dhcpd.conf
#
option domain-name "my-domain.local";
option domain-name-servers 192.168.1.10, 192.168.1.11;

default-lease-time 600;
max-lease-time 7200;
ddns-update-style none;
ignore client-updates;
allow booting;
allow bootp;
next-server 192.168.1.131;
log-facility local7;
subnet 192.168.1.0 netmask 255.255.255.0
{
        option broadcast-address 192.168.1.255;
        option domain-name-servers 192.168.1.10, 192.168.1.11;
        option domain-name "your-domain.com";
        option routers 192.168.1.1;
        default-lease-time 600;
        max-lease-time 3600;
        #
        # Production VM's - add single or groups here
        #
        include "/etc/dhcp/conf.d/host-1-here.conf";
        include "/etc/dhcp/conf.d/host-2-here.conf";
        include "/etc/dhcp/conf.d/host-group-here.conf";
}
#
# End of file
In the woking config above, I configured both single include files for each host and a sample “group file” with multiple entries. In my production system, each host gets it’s own file and they live in /etc/dhcp/conf.d which I created using:
mkdir /etc/dhcp/conf.dHere is a sample of a host dhcp config for a host called “efi-test-1” and it’s going to boot up an Oracle Linux 8.9 environment, the tftp server is at 192.168.1.131:
#
group
{
 filename "ol89/BOOTX64.EFI";
 next-server 192.168.1.131;
 host efi-test-1
 {
  hardware ethernet 00:50:56:9c:a2:ac;
  fixed-address 192.168.1.133;
  option host-name "efi-test-1";
 }
}
The key point to note is the “filename” which is in two parts, first is the directory name “ol89” located in the tftpboot directory, and the file BOOTX.EFI which I copied from the ISO image for OL8.9.
If you modify anything of the dhcp configs you must do a “systemctl restart dhcpd” to take effect.
Step 2 – Setting up TFTP
The tftp server is invoked using xinetd, so you need to create a config file entry for tftp and place it in /etc/xinetd.d/tftp
Using vi, create a file called tftp in the /etc/xinetd.d directory. it’s contents need to look like:
service tftp
{
socket_type = dgram
protocol = udp
wait = yes
user = root
server = /usr/sbin/in.tftpd
server_args = -s /data/tftpboot
disable = no
per_source = 11
cps = 100 2
flags = IPv4
}
For modularity, I create a directory called /data/tftpboot to hold all the boot images and the directory called /data/isos to hold the ISO image of each system I want to be able to deploy (/data is a separate mount point with around 100G of space to hold images). Create the directories now using the following commands:
mkdir -p /data/isos
mkdir -p /data/tftpboot
Once you have created the directories, restart xinetd, it should now be able to respond to tftp requests.
systemctl restart xinetdDownloading Oracle linux ISO images
For this tutorial I will use OL8.9 but you can use the same process to deploy fedora, Ubuntu, RHEL and centos to name a few. Change into the /data/isos directory and download the OL8.9 image using:
cd /data/isos
wget https://yum.oracle.com/ISOS/OracleLinux/OL8/u9/x86_64/OracleLinux-R8-U9-x86_64-dvd.iso
In my working server I have a few ISO’s downloaded:
[/data/isos]#ls -ls
total 65027052
drwxrwxr-x  2 root root        4096 Mar 28 13:55 .
drwxrwxr-x. 5 root root        4096 Mar 20 15:37 ..
-rw-r--r--  1 root root  4712300544 Nov  4  2020 CentOS-7-x86_64-DVD-2009.iso
-rw-r--r--  1 root root 12062818304 Nov 12  2022 OracleLinux-R8-U7-x86_64-dvd.iso
-rw-r--r--  1 root root 12414091264 May 23  2023 OracleLinux-R8-U8-x86_64-dvd.iso
-rw-r--r--  1 root root 13434355712 Nov 21 23:38 OracleLinux-R8-U9-x86_64-dvd.iso
-rw-r--r--  1 root root 10267656192 May 16  2023 OracleLinux-R9-U2-x86_64-dvd.iso
-rw-r--r--  1 root root 11034165248 Nov 16 10:57 OracleLinux-R9-U3-x86_64-dvd.iso
-rw-r--r--  1 root root  2662275072 Oct 11 14:52 ubuntu-23.10-live-server-amd64.iso
[/data/isos]#
Setting up the EFI Boot Menu environment
In my environment I am aiming to streamline to two OS distributions but I currently have to support multiple OS versions (legacy images) while we port the configuration to a new environment. To streamline deployment I place each environment in it’s own directory, for CENTOS7.9 I use the name “c79”, for Oracle Linux 8.9 is use “ol89” etc For this tutorial create a directory under the /data/tftpboot directory called ol89. Execute the command below:
mkdir /data/tftpboot/ol89Now we need some files from the OL 8.9 ISO, so we need to mount it and copy them over. Use the following command to (temporarily) mount the iso to /mnt:
mount -t iso9660 /data/isos/OracleLinux-R8-U9-x86_64-dvd.iso /mntIf all went well you should be able to do a directory listing of the /mnt/EFI/BOOT directory on the ISO and see the following:
[/data/isos]# ls -al /mnt/ol89/EFI/BOOT
total 6992
dr-xr-xr-x 3 root root 2048 Nov 19 09:18 .
dr-xr-xr-x 3 root root 2048 Nov 19 09:18 ..
-r--r--r-- 1 root root 1359 Nov 19 09:18 BOOT.conf
-r-xr-xr-x 1 root root 753840 Jan 7 2023 BOOTIA32.EFI
-r-xr-xr-x 1 root root 949280 Jan 7 2023 BOOTX64.EFI
dr-xr-xr-x 2 root root 2048 Nov 19 09:18 fonts
-r--r--r-- 1 root root 1359 Nov 19 09:18 grub.cfg
-r-xr-xr-x 1 root root 1531568 Oct 23 19:18 grubia32.efi
-r-xr-xr-x 1 root root 2367664 Oct 23 19:18 grubx64.efi
-r-xr-xr-x 1 root root 683288 Jan 7 2023 mmia32.efi
-r-xr-xr-x 1 root root 860440 Jan 7 2023 mmx64.efi
-r--r--r-- 1 root root 1995 Nov 19 09:21 TRANS.TBL
[root@tri-dhcpd-90 isos]#
Everything we need to boot the EFI environment is on the ISO, however we need to copy it to our /data/tftpboot/ol89 directory. Use the following copy command to get the required grub boot files and directories using:
cp -r /mnt/EFI/BOOT/* /data/tftpboot/ol89Next we need the OS boot images directory:
cp -r /mnt/images/ /data/tftpboot/ol89The last thing to do is to match the host to the correct menu, this is done using the MAC address. But first lets un-mount our ISO using:
umount /mntConfiguring a GRUB Menu for our host
When we copied the menu and images from the ISO, we copied a configuration where the ISO is mounted and everything is directly accessible. However we have now put them into a sub-directory on our hard disk, the path is /data/tftpboot/ol89/. We need to reference everything from the ol89 directory and tie it to the MAC address of the VM we want to boot up (the MAC address is in the dhcpd configuration file for the host you created previously). Let’s copy the grub file to the correct format as follows:
cd /data/tftpboot/ol89
cp grub.cfg grub.cfg-01-00-50-56-9c-a2-ac
When the VM boots it will now use this config and you can verify it by tailing the /var/log/messages file (see “Monitoring the boot process” below).
Editing the grub menu
Now we need to edit the new grub menu file (grub.cfg-01-00-50-56-9c-a2-ac) and add our entry to point to the images directory, later we will need to modify it again to point to our web server so the kickstart files can be accessed.
Using vi, edit the file and add the /ol89 to the start of the paths, so the line:
linuxefi /images/pxeboot/vmlinuz inst.stage2=hd:LABEL=OL-8-9-0-BaseOS-x86_64 quietbecomes
linuxefi /ol89/images/pxeboot/vmlinuz inst.stage2=hd:LABEL=OL-8-9-0-BaseOS-x86_64 quietIf your edits were correct then when you boot the environment and select “Install” you should see the OL8.9 images load, in the /var/log/messages file you will see something like:
Mar 28 14:34:02 tri-dhcpd-90 in.tftpd[30575]: Client 10.140.90.133 finished ol89/grubx64.efi
Mar 28 14:34:03 tri-dhcpd-90 in.tftpd[30576]: Client 10.140.90.133 finished ol89/grub.cfg-01-00-50-56-9c-a2-ac
Mar 28 14:34:03 tri-dhcpd-90 in.tftpd[30581]: Client 10.140.90.133 finished ol89/grub.cfg-01-00-50-56-9c-a2-ac
Mar 28 14:34:07 tri-dhcpd-90 in.tftpd[30582]: Client 10.140.90.133 finished /ol89/images/pxeboot/vmlinuz
The problem now is we only copied the BOOT environment, the packages etc are still on the ISO and we still want to kickstart our environment with our SOE. This is where we build a working web server and remount our ISO images in a common point that is easy for the web server to access.
Step 3 – Deploying the web based kickstarter Environment
In Step 2 we were able to boot our environment because we copied the boot environment, but with no access to packages we can’t build an image onto our VM’s hard disk. In this section we will remount all our ISO images and deploy a kickstart file.
The filesystems we want to publish are:
- http://192.168.1.131/kickstart-files/
- http://192.168.1.131/ol89
Mount the ISO(s)
In the /var/www/html directory we will create an ol89 directory to hold our first ISO. Execute the following two commands:
# mkdir -p /var/www/html/ol89
# mount -t iso9660 /data/isos/OracleLinux-R8-U9-x86_64-dvd.iso /var/www/html/ol89
We should also add an entry to our /etc/fstab file to make sure the ISO is remounted when we re-boot. Add the following line to the end of /etc/fstab:
/data/isos/OracleLinux-R8-U9-x86_64-dvd.iso /var/www/html/ol89 iso9660 loop 0 0
Create the kickstart-files directory
We want our kickstart file to live in /var/www/html/kickstart-files. Execute the following command:
mkdir -p /var/www/html/kickstart-files
Aliasing our directories
In the package install section above, we installed httpd, you could use nginx if you like, but for ease of deployment I went with a simpler approach.
To make it easy to access a directory index of the directories we have files in create a file called efi.conf in /etc/httpd/conf.d/efi.conf
#
Options +Indexes +FollowSymLinks AllowOverride None Require all granted
Alias /kickstart /var/www/html/kickstart-files
Alias /kickstart-files /var/www/html/kickstart-files
Alias /ol89 /var/www/html/ol89
Restart the web server using “systemctl restart httpd” and then navigate to http://192.168.1.131/ol89 you should see the ISO image.
Each time you mount a new ISO, create a directory and add an alias and add an entry in your /etc/fstab file to persist it between reboots.
The Kickstart file
There are numerous online kickstart generators on the internet so you can build and customise your boot environment. Below is the basic file I start with before I make any changes. Place this file in the “kickstart-files” directory and name it ks.cfg:
lang en_US
keyboard us
timezone Australia/Sydney --utc
rootpw $2b$10$MQyLhFsnaSKMZ8FMaIcng./MnKBpWqqlZA2uDOWb4MCWZKKv5gbn. --iscrypted
reboot
url --url=http://192.168.1.131/ol89
bootloader --append="rhgb quiet crashkernel=auto"
zerombr
clearpart --all --initlabel
autopart
network --device=ens192 --hostname=efi-test-1 --bootproto=static --ip=192.168.1.133 --netmask=255.255.255.0 --gateway=192.168.1.1 --nameserver=8.8.8.8
skipx
firstboot --disable
selinux --enforcing
%packages
@^minimal-environment
kexec-tools
%end
Changing GRUB to use a kickstart file
When the grub menu boots it selects option 1 which is to verify the ISO image, we don’t need this in our custom install so we can reduce our grub menu significantly and just have the first entry selected with a change to download via http rather than do a stage 2 install.
Open the grub boot file grub.cfg-01-00-50-56-9c-a2-ac and change the first line to:
set default=”0″
Then modify the first menu option from:
linuxefi /ol89/images/pxeboot/vmlinuz inst.stage2=hd:LABEL=OL-8-9-0
-BaseOS-x86_64 quiet
To:
linuxefi /ol89/images/pxeboot/vmlinuz inst.ks=http://191.168.1.131/kickstart-files/ks.cfgThe complete grub file should look similar to:
set default=”0″
function load_video {
insmod efi_gop
insmod efi_uga
insmod video_bochs
insmod video_cirrus
insmod all_video
}
load_video
set gfxpayload=keep
insmod gzio
insmod part_gpt
insmod ext2
set timeout=600
search –no-floppy –set=root -l ‘OL-8-9-0-BaseOS-x86_64’
menuentry 'Install OL8.9 on host efi-test-1.locahost'--class fedora --class gnu-linux --class gnu --class os {
linuxefi /ol89/images/pxeboot/vmlinuz inst.ks=http://191.168.1.131/kickstart-files/ks.cfg
initrdefi /ol89/images/pxeboot/initrd.img
}
menuentry 'Rescue a Oracle Linux system' --class fedora --class gnu-linux --class gnu --class os {
linuxefi /ol89/images/pxeboot/vmlinuz inst.stage2=hd:LABEL=OL-8-9-0-BaseOS-x86_64 inst.rescue quiet
initrdefi /ol89/images/pxeboot/initrd.img
}
Booting you new Image
With the changes above, you should now be able to boot the image and download the kickstart file, from this the menu options in the anaconda GUI will be set and the installation should be automated. You should monitor the httpd logs to see any errors and you can monitor the DHCP and TFTP operations as described in the next wection.
Monitoring the boot process
The file /etc/xinetd.d/tftp
Mar 28 12:53:57 tri-dhcpd-90 dhcpd[18503]: DHCPREQUEST for 192.168.1.133 (192.168.1.131) from 00:50:56:9c:a2:ac via ens192
Mar 28 12:53:57 tri-dhcpd-90 dhcpd[18503]: DHCPACK on 192.168.1.133 to 00:50:56:9c:a2:ac via ens192
Mar 28 12:53:57 tri-dhcpd-90 xinetd[1176]: START: tftp pid=29957 from=192.168.1.133
Mar 28 12:53:58 tri-dhcpd-90 in.tftpd[29957]: cannot setsockopt IPV6_RECVPKTINFO Protocol not available
Mar 28 12:53:58 tri-dhcpd-90 in.tftpd[29958]: tftp: client does not accept options
Mar 28 12:53:58 tri-dhcpd-90 in.tftpd[29959]: Client 192.168.1.133 finished ol89/BOOTX64.EFI
Mar 28 12:53:58 tri-dhcpd-90 in.tftpd[29960]: Client 192.168.1.133 finished ol89/grubx64.efi
Mar 28 12:53:58 tri-dhcpd-90 in.tftpd[29961]: Client 192.168.1.133 finished ol89/grub.cfg-01-00-50-56-9c-a2-ac
Mar 28 12:53:58 tri-dhcpd-90 in.tftpd[29966]: Client 192.168.1.133 finished ol89/grub.cfg-01-00-50-56-9c-a2-ac
Mar 28 12:54:01 tri-dhcpd-90 in.tftpd[29967]: Client 192.168.1.133 finished /ol89/images/pxeboot/vmlinuz
Mar 28 12:54:13 tri-dhcpd-90 in.tftpd[29971]: Client 192.168.1.133 finished /ol89/images/pxeboot/initrd.img
Mar 28 12:54:24 tri-dhcpd-90 dhcpd[18503]: DHCPDISCOVER from 00:50:56:9c:a2:ac via ens192

...
-oOo-