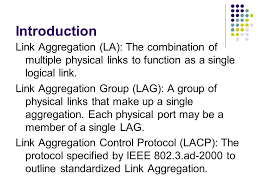
Implementing a Link Aggregation Group (LAG) that uses LACP to aggregate all the defined ethernet links is a well used and documented process. However under Redhat/CENTOS 7 and 8 the addition of NetworkManager can both throw a spanner in the mix and allow an easy way to dynamically add LACP during a kickstart install.
During the HPC re-engineering project, I decided to implement a kickstart build process for the compute nodes so they could be built automatically via PXE boot. This had the advantage that as new nodes were added, they would be consistent with the pre-existing nodes. However, I hit a snag trying to build a LAG group during kickstart and have it survive the first reboot.
For some reason, changes to the network during kickstart did not flow through after a reboot, despite the fact the commands executed fine. So after days of trial and error, I decided a shell script with the NetworkManager commands to build the LAG was a far better option.
Anatomy of scripting an LACP build
There are two ways to script the creation of an LACP bond, echo out the lines to each file OR use “nmcli” to do the hard work for you. I chose to use nmcli so that the devices, IP’s etc could be extracted correctly and then use to recreate the interface definition file.
Get the IP
The first step is to extract out some basic info, if you run nmcli with the “con show” options it will show you the current configuration, of devices as shown below:
# nmcli con show
NAME    UUID                                  TYPE      DEVICE
ens192  befe0d4e-96bf-4941-a9bc-530147176954  ethernet  ens192
ens224  37e9af99-0922-3933-ac78-31b1010053e8  ethernet  ens224
#
The entries in this case are in green, so they are both active. The UUID is important for removing the entry later, so we need to gather that in our script. If we look at the devices and use “terse” mode via the “-t” switch, we can gather information slightly differently:
# nmcli dev
DEVICE  TYPE      STATE      CONNECTION
ens192  ethernet  connected  ens192
ens224  ethernet  connected  ens224
lo      loopback  unmanaged  --
#
Since we want to add both these ethernet links into a bond, we want to collect device 1 and device 2 separately and the UUID so we can remove the ethernet links. If your output has more Ethernet connections then you will need to change the code. Essentially we want the first and last Ethernet device using:
DEV1=`nmcli -t dev|grep ethernet|head -1|cut -f1 -d":"`
DEV2=`nmcli -t dev|grep ethernet|tail -1|cut -f1 -d":"`
UUID_DEV1=`nmcli con show ${DEV1}|grep uuid|cut -f2 -d":"|xargs`
UUID_DEV2=`nmcli con show ${DEV2}|grep uuid|cut -f2 -d":"|xargs`
Next we want the IP of the primary link (device 1) (and create the gateway address), so we can gather that with:
MYIP=`ifconfig $DEV1 | grep "inet "|xargs $1|cut -f2 -d" "`
MYGW=`echo $MYIP|cut -f1-3 -d"."`.1
In this case the network is a full class C, so the mask is 255.255.255.0 and the gateway is at the .1 address.
Creating the bond0 device
Using nmcli, we can programmatically create the bond0 device with IP address etc in one easy command (and set the bonding options):
# nmcli con add type bond con-name bond0 ifname bond0 mode 802.3ad ip4 192.168.10.${MYQUAD}/24
# nmcli con mod id bond0 bond.options mode=802.3ad,miimon=100,lacp_rate=fast,xmit_hash_policy=layer2+3
#
Adding the slaves
The bond on its own will not be able to do anything without the slave Ethernet links. Since these have their own interface definitions, we need to delete them using the UUID we captured and then re-create them as slave attached to the bond0 device.
Using nmcli we first delete the two ethernet devices:
# nmcli con del uuid ${UUID_DEV1}
# nmcli con del uuid ${UUID_DEV2}
#
Then we re-create them as slaves and attach them to the bond0 device:
# nmcli con add type bond-slave ifname ${DEV1} con-name ${DEV1} master bond0
# nmcli con add type bond-slave ifname ${DEV2} con-name ${DEV2} master bond0
#
Using VLANs with bonds
If you plan to use VLANs over the bond then you need to perform the following command to tie the VLAN ID and IP address, in this configuration the VLAN Id is 740. When creating the bond, we use the IP and GW we captured earlier and insert it into the command line as a shell variable i.e. ${MYIP} and ${MYGW}:
# nmcli con add type vlan ifname bond0.740 con-name bond0.740 id 740 dev bond0 ip4 ${MYIP}/24 gw4 ${MYGW}
#
Here is the working script in full, it creates the bond0, adds two VLANs with ip 192.168.10.x and 192.168.94.x and then disables NetworkManager so it does not delete the bonding and reboots the server:
#!/bin/bash
#
# create a bonding interface
#
systemctl start NetworkManager


DEV1=`nmcli -t dev|grep ethernet|head -1|cut -f1 -d":"`
DEV2=`nmcli -t dev|grep ethernet|tail -1|cut -f1 -d":"`
UUID_DEV1=`nmcli con show ${DEV1}|grep uuid|cut -f2 -d":"|xargs`
UUID_DEV2=`nmcli con show ${DEV2}|grep uuid|cut -f2 -d":"|xargs`

MYIP=`ifconfig $DEV1 | grep "inet "|xargs $1|cut -f2 -d" "`
MYGW=`echo $MYIP|cut -f1-3 -d"."`.1
MYQUAD=`echo $MYIP|cut -f4 -d"."`
NET94=`echo $MYIP|cut -f1-2 -d"."`.94.${MYQUAD}

echo "Extracted Info....."
echo "-------------------"
echo "DEV1: ${DEV1}"
echo "DEV2: ${DEV2}"
echo "UUID1: ${UUID_DEV1}"
echo "UUID2: ${UUID_DEV2}"
echo "MYIP: ${MYIP}"
echo "MYGW: ${MYGW}"
echo "Quad: ${MYQUAD}"
echo "NET94: ${NET94}"

nmcli con add type bond con-name bond0 ifname bond0 mode 802.3ad ip4 192.168.10.${MYQUAD}/24
nmcli con mod id bond0 bond.options mode=802.3ad,miimon=100,lacp_rate=fast,xmit_hash_policy=layer2+3

nmcli con del uuid ${UUID_DEV1}
nmcli con del uuid ${UUID_DEV2}
nmcli con add type bond-slave ifname ${DEV1} con-name ${DEV1} master bond0
nmcli con add type bond-slave ifname ${DEV2} con-name ${DEV2} master bond0

nmcli con add type vlan ifname bond0.740 con-name bond0.740 id 740 dev bond0 ip4 ${MYIP}/24 gw4 ${MYGW}
# add an additional VLAN 752
nmcli con add type vlan ifname bond0.752 con-name bond0.752 id 752 dev bond0 ip4 ${NET94}/24
nmcli con up ${DEV1}
nmcli con up ${DEV2}
nmcli con up bond0.740
nmcli con up bond0
systemctl disable NetworkManager
reboot